CHROME BOX FIRST INSTALL AND CONFIGURATION
Initial Chromebox configuration
- Connect the Chromebox to an input HDMI port on your TV through the HDMI cable.
- If you are using a physical Ethernet network connection, connect the Chromebox to the network through the Ethernet cable.
- Connect a keyboard and a mouse using the USB ports on the device.
- Plug the power cable to the device and to the power point.
- Press the on button. The device should turn lights on.
- On your TV, select the HDMI video input related to the device. The main Chromebook screen should be shown.
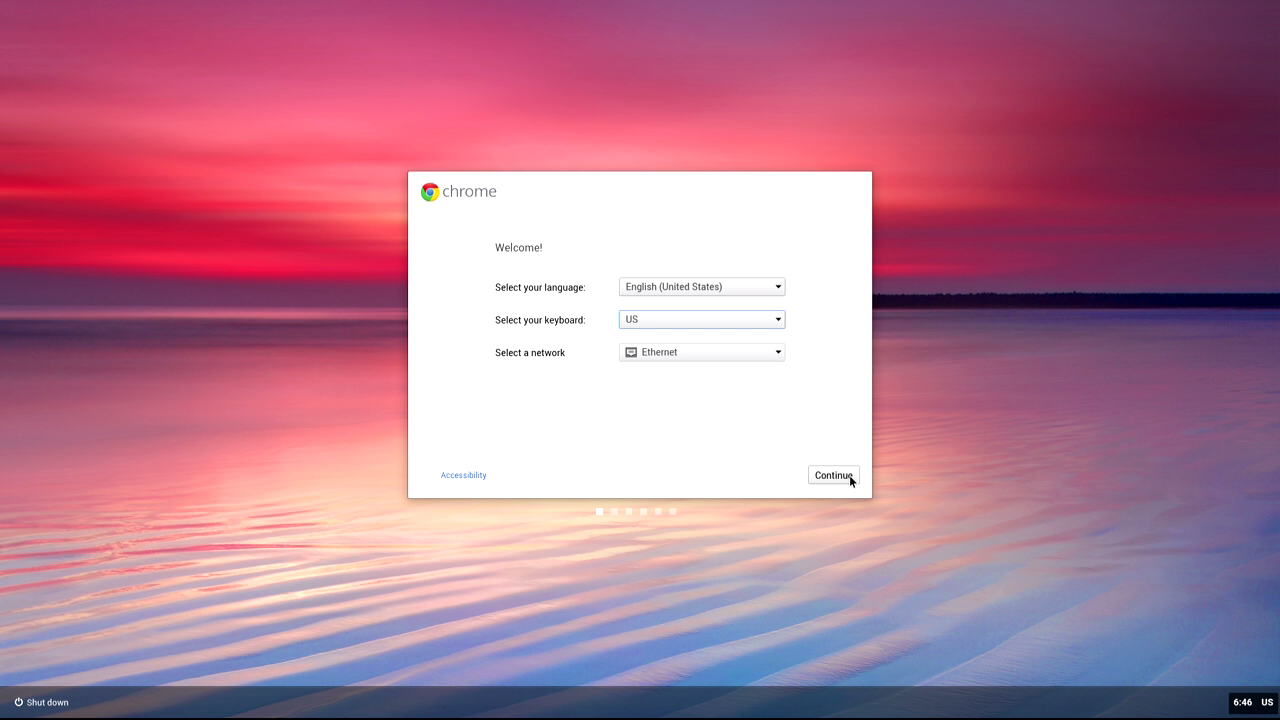
- Follow the steps pointed out by the on-screen wizard to make the initial configurations (language selection, network setup, terms an conditions acceptance…).

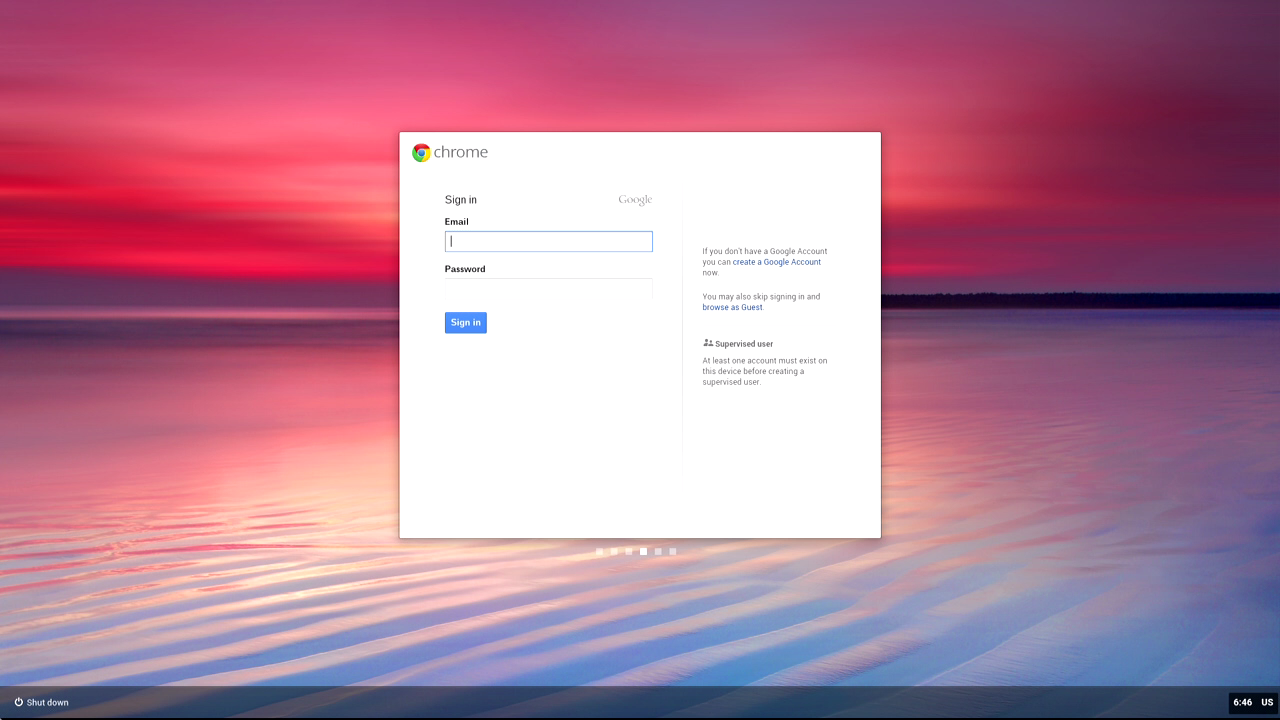
- Ente your Google account data in order to use the Chromebook.
Kiosk mode activation and Showcases ChromeApp installation
Use the keyboard direct access Ctrl+Alt+K in the session init screen for opening the kiosk mode activation window. Select Enable at the dialog popup in order to allow your device to run kiosk mode compatible applications. 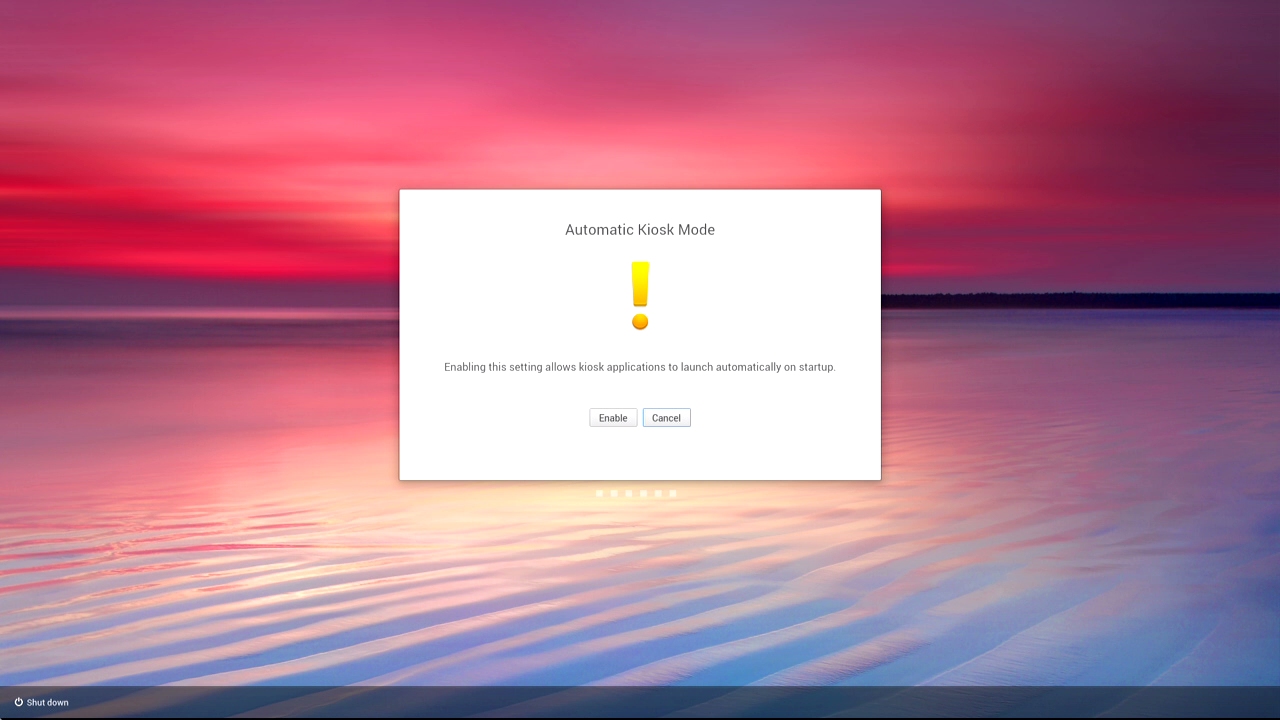 Once you have installed the Showcases application, you could use it. To do it, follow the next steps:
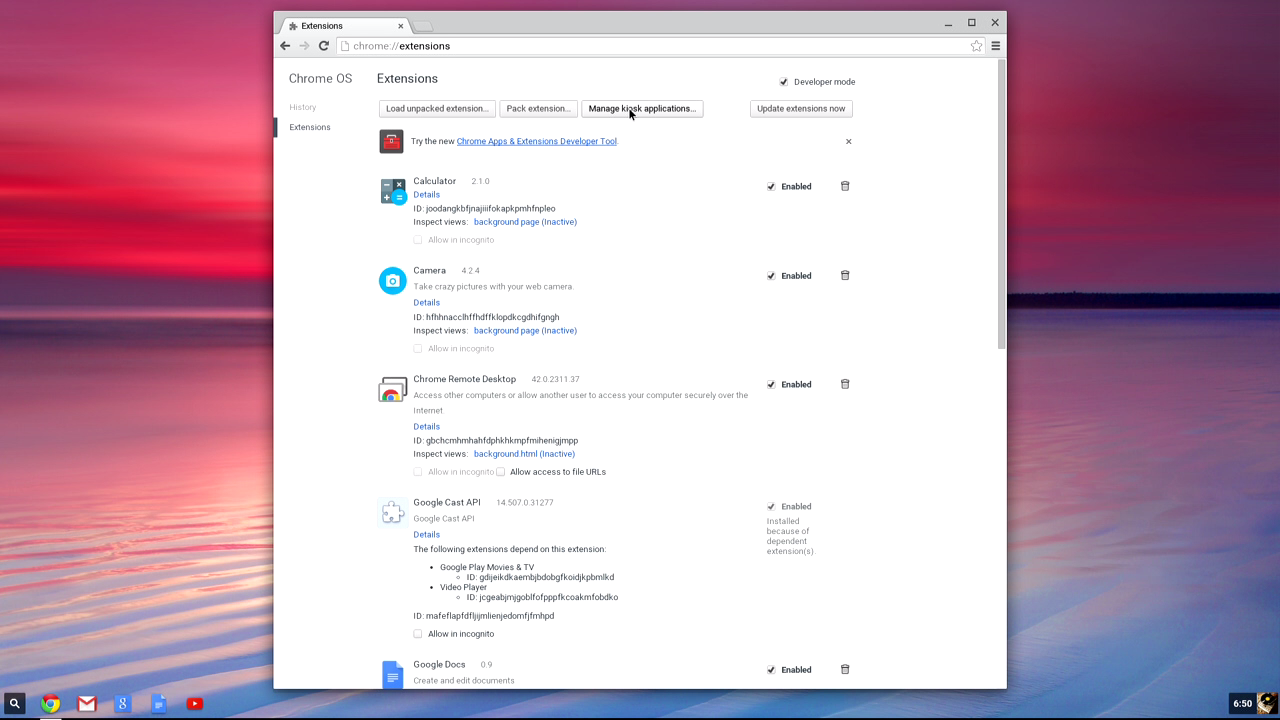
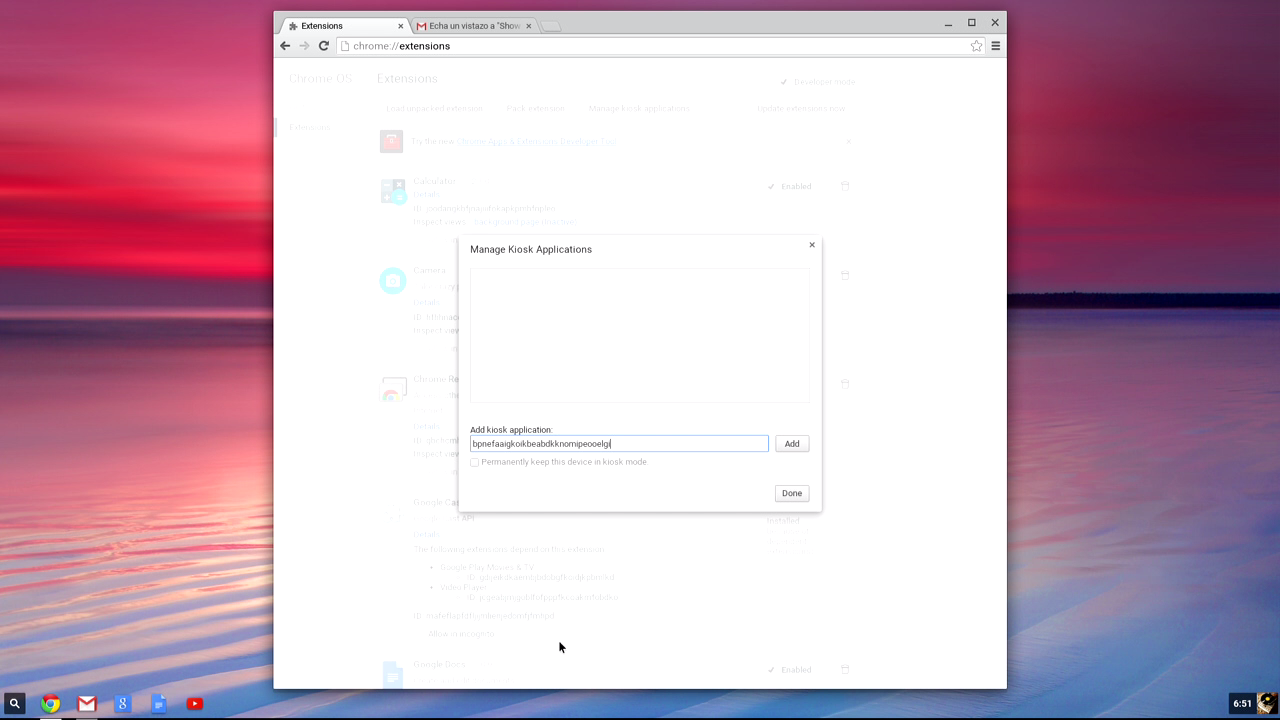
- Open a new tab at Chrome and write chrome://extensions in the address bar. Press Intro.
- Check the box next to Developer mode.
- Click on Add kiosk application.
- Enter the Showcases application ID. This ID is: bpnefaaigkoikbeabdkknomipeooelgi. Press Intro.
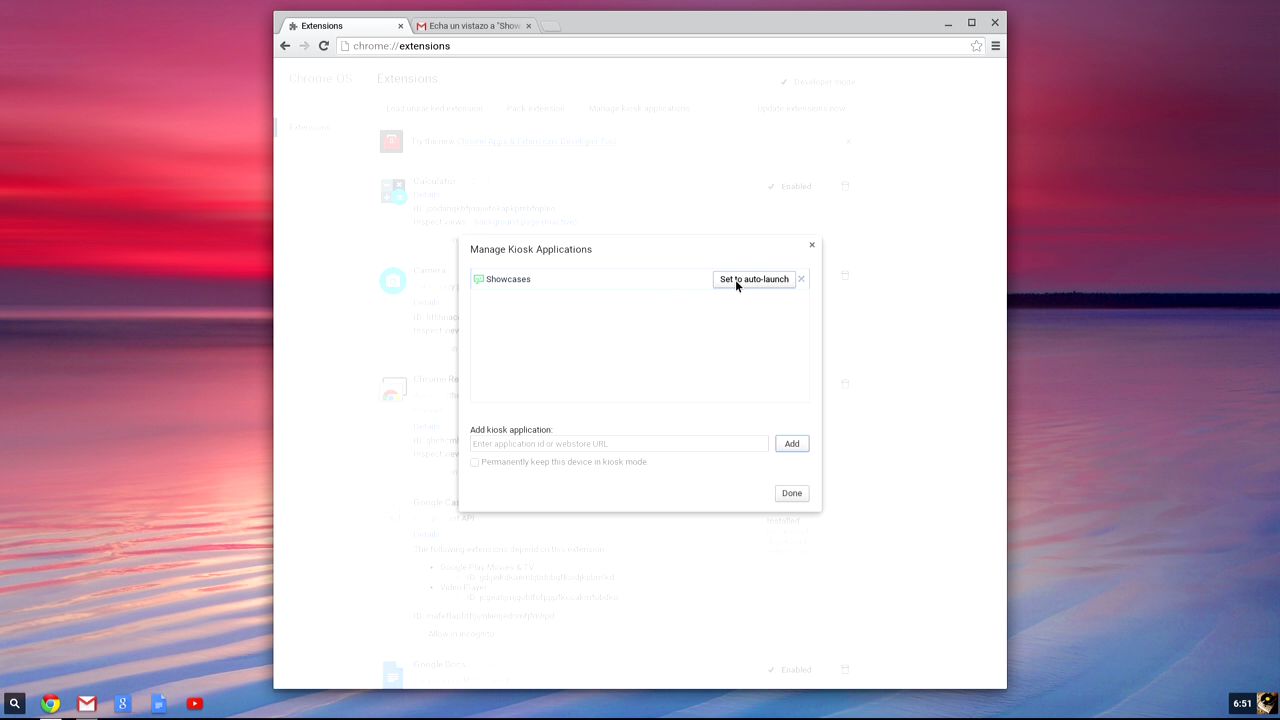
- Click on the Set to auto-launch button to make let the application automatically init. If you do not click on this button, the kiosk application could be launched from the bookcase.
- On the next reboot, you will be asked for enabling kiosk mode. Select Enable.
- Then, you will see an option for launching the installed kiosk application on the device startup. Select Confirm.

- It’s done! now the showcases application will automatically start at the Chromebox startup, what will allow you to deploy your interactive showcase.

Showcase deployment
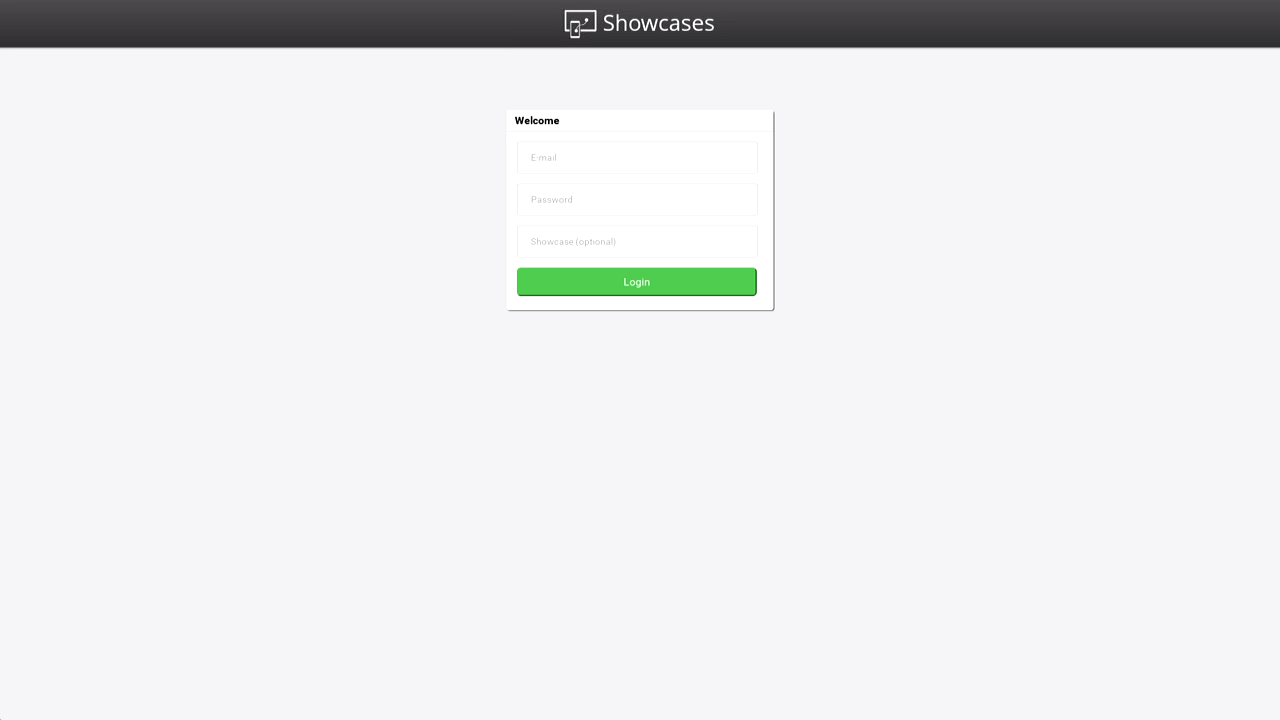
- Turn on your Chromebox with the Movilok Showcases application kiosk mode configuration. After a while you will see the login form. Enter your Movilok Showcases user name and password. Optionally you can also enter the code of your showcase.
- If you did not enter the code at the previous step, select it right now among the showcases list.
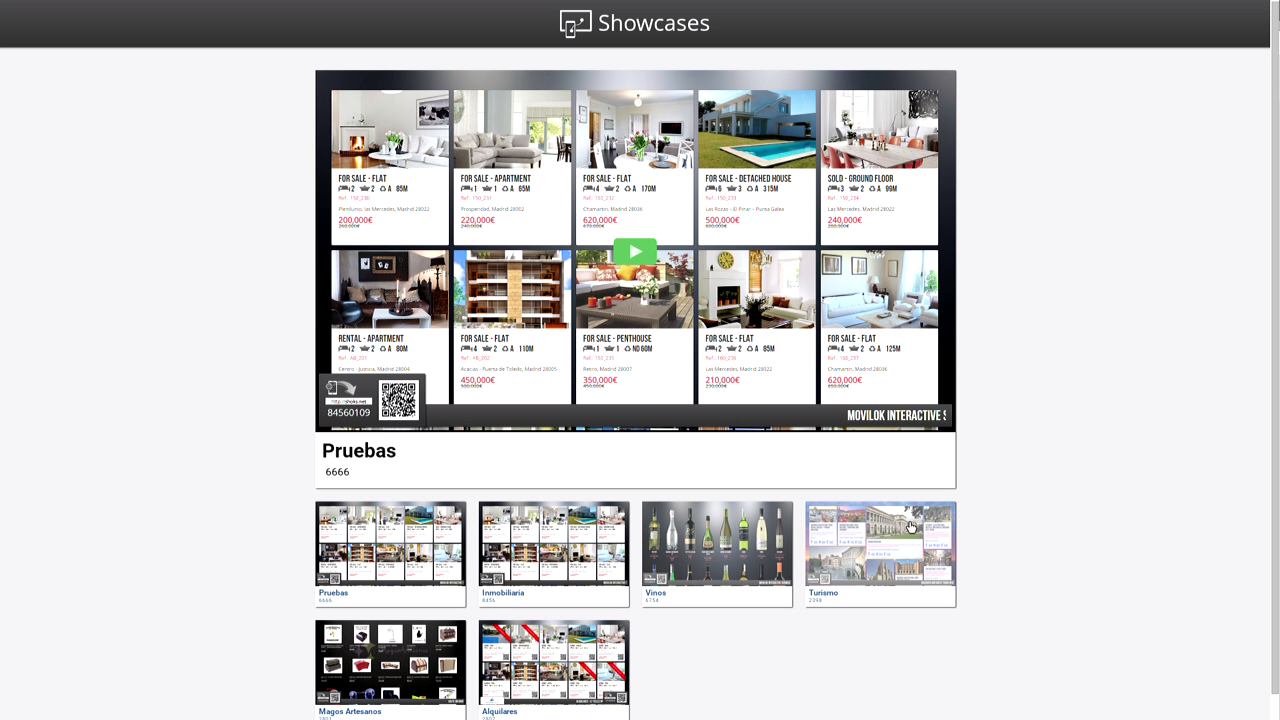
- It’s done! your showcase will start to be shown on the screen.

- If you want you can unplug the keyboard. The next time you turn on the Chromebox, your showcase will automatically start. If you want, you might cancel that automatic start in order to select a different showcase.